Managing Dark Web Search Findings
Bolster’s Dark Web module monitors anonymous sources like Tor, I2P, and Telegram to surface exposed credentials, stolen data, and other threats based on your specific search terms.
These findings help your security team take timely, focused action on the threats that matter most.
To stay ahead of credential leaks, brand abuse, and threat actors operating in anonymous channels, follow this basic workflow:
- Review new threats as they appear.
- Route them to the right people, manually or via playbooks.
- Mark each one as mitigated or ignored based on your response.
Full Workflow
The module’s lists of Active, Mitigated, and Ignored Findings help you track this process and understand where each item is in your workflow. The list of Threat Actors helps you understand who is targeting your organization or brand.
Meanwhile, get a snapshot of real-time activity anytime on the Dark Web Dashboard.
Here’s what happens, starting with Bolster detecting a threat based on the search terms you have set up:
- Bolster discovers a new threat and adds it to the Active Findings list by default.
- Automated workflows alert people in your organization.
- Your team reviews the new threat and optionally adds tags to keep things organized.
- You either mitigate the threat or decide not to take action.
- You manually mark it as Mitigated or Ignored.
This setup supports ongoing triage and helps your team stay organized as threats evolve. Your team gets a clear view of what still needs attention, what’s been addressed, and what’s no longer relevant.
Findings Lists
Here are the highlights of the findings lists:
- Each finding is automatically added a list: Active Findings, Mitigated Findings, or Ignored Findings, depending on its Status value.
- Access these lists from the navigation on the left side of the Dark Web module. Use the toggle in upper right to open or close the navigation bar.

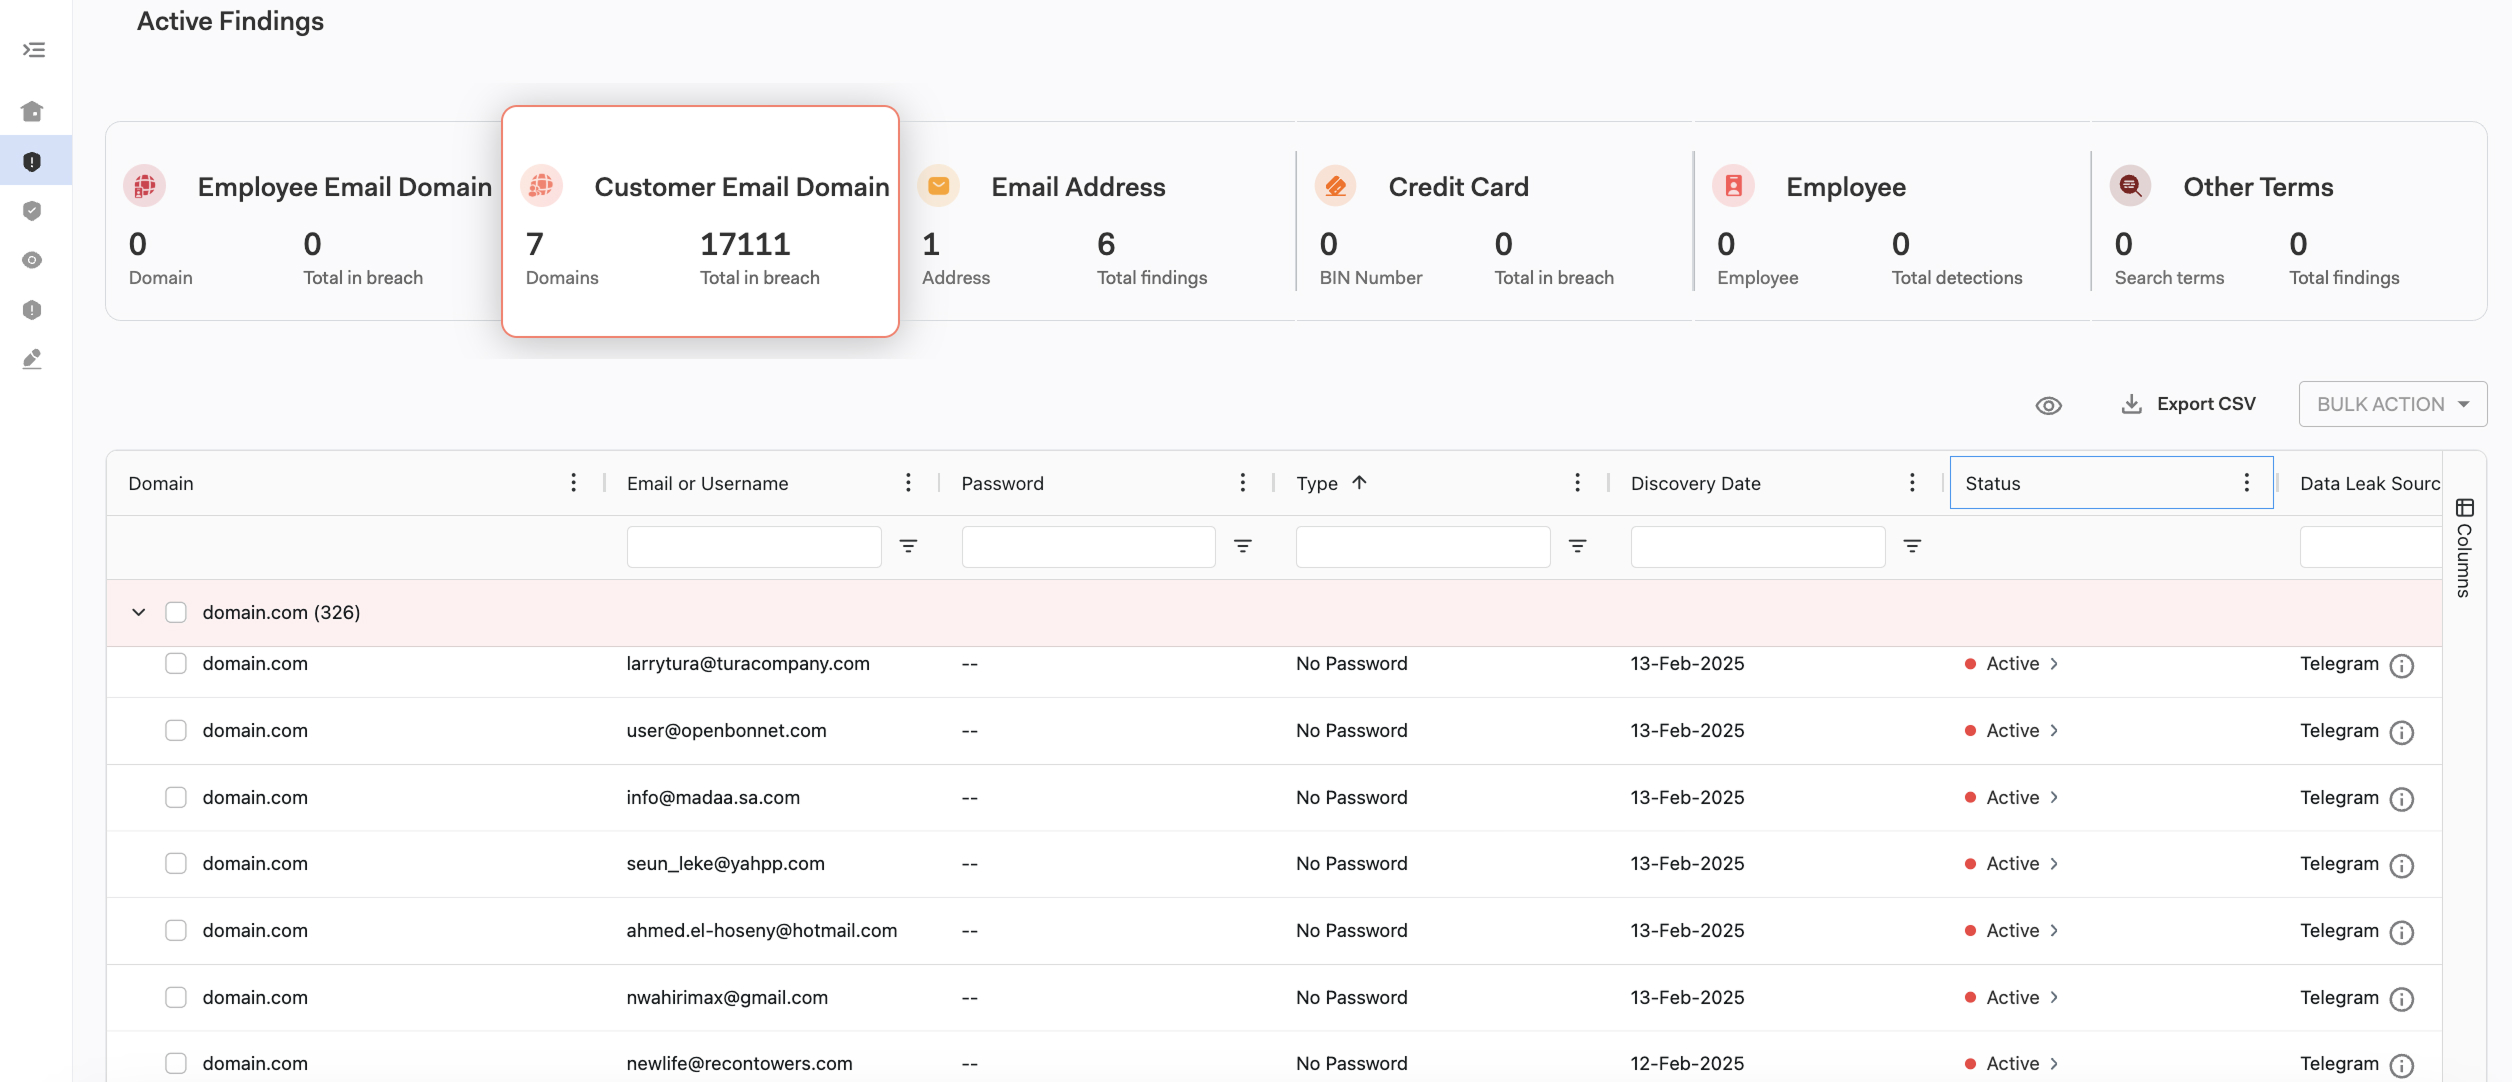
- The summary boxes at the top show key metrics, broken down by entity (information type). Select a box to go to that entity’s findings.
- Adjust which columns appear using the checkbox menu, open by default on the right. The sideways Columns label operates as a toggle to open or close the menu.

- Search, filter (and save filters), perform bulk actions, and export findings to CSV from this screen.
- Select the info icon next to a Data Leak Source to see where the finding came from.
- Directly update the status of a finding by selecting a status value. A menu will open where you can choose a new status for that finding.

Findings Lists Breakdown
The lists are organized in the same way. The difference is what findings they contain and what steps you can take from this screen.
| List | Contents | Inclusion Criteria | Available Actions |
| Active Findings | Potential threats that require review or action | A new finding is detected based on your search terms with status automatically set to Active |
|
| Mitigated Findings | Findings your team has acted on and marked as addressed | Someone selects Mitigated as the new status |
|
| Ignored Findings | Findings deemed out of scope or not relevant to your organization or threat workflow | Someone selects Ignored as the new status |
|
Threat Actors
A fourth list, Threat Actors, is also accessible from the left-side navigation. It focuses findings on the people posting potential threats on the dark web.
Use this screen to:
- See which threat actors have been active recently.
- See the type and threat level of each one’s work.